

How To Delete Windows In Blender
Before yous can beginning rigging and animating your models, you will demand to learn how to add together bones. Whether you need a realistic scene or an animated graphic symbol for an indie game, Blender is an all-in-one solution for designing such assets.
In this article, nosotros volition delve into this process of adding basic to your model, starting with taking a closer look at the concept of an armature. Then, nosotros will go through the central steps such equally how to add, frame, extrude, and categorize bones, too equally look at some last tips.
Armature and Bones in Blender
An armature is a type of object in Blender, more specifically, it's a skeleton-like structure that consists of linked bones. Only put, you can use the basic in an armature to deform other objects. This comes into use when you lot want to create puppet-like controls for your character blitheness.
The armature is fabricated of bones that deed as unit elements, merely like bones in the human skeleton. There is a caput and a tail, which are the start and cease of a os, and they can be moved and scaled every bit required while the body connects them. As they human action similar whatsoever other object in Blender, this means they tin can be rotated likewise.
This is one of the basic starting time steps for rigging your model as well as later posing and animating. Now that we've cleared this upwardly, let's delve into working with bones Blender.
Step 1: Add
Offset, nosotros need to add a bone. To practise that, follow the below steps:
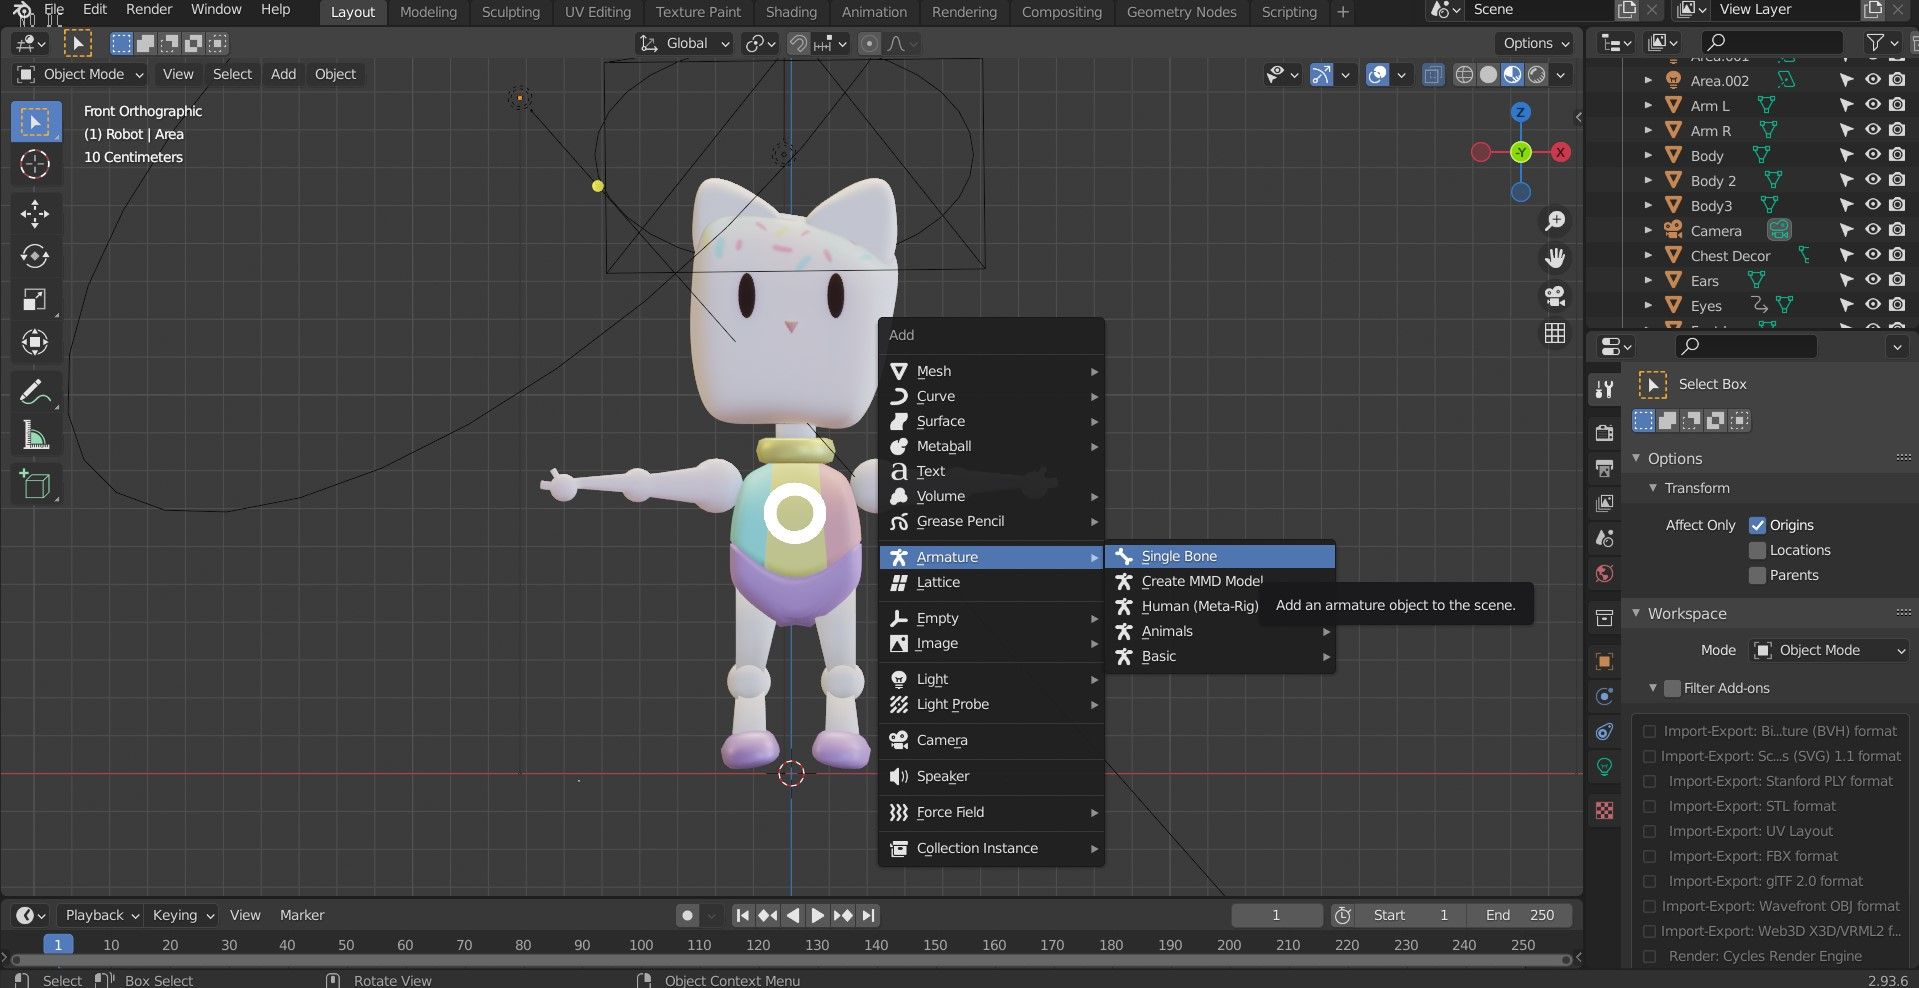
- Become into Object way by hitting the T ab key.
- Hit Shift + A to open up the Add together menu. Information technology's worth noting that there are diverse useful shortcuts in Blender, to view these shortcuts cheque out our write-up on Blender 3.0 Keyboard Shortcuts.
- Navigate to and click on the Armature option, this will add a single os to the scene.
Step 2: Frame
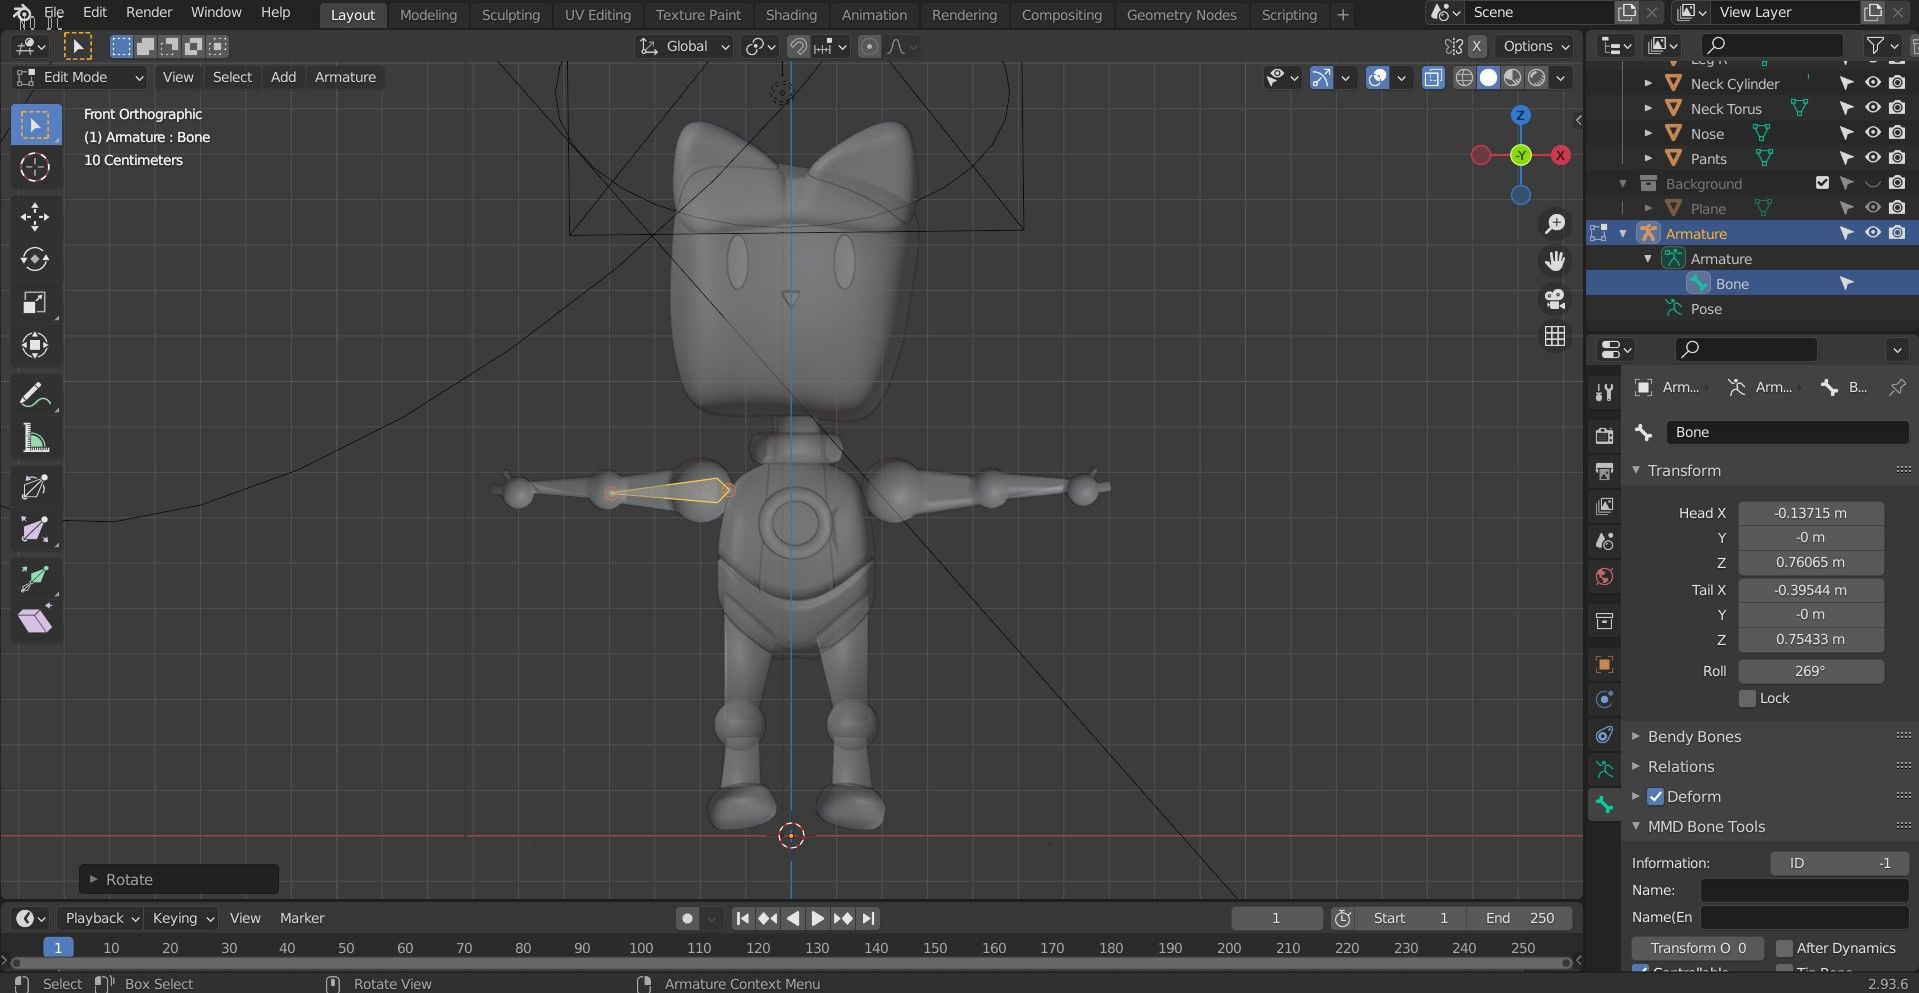
At present that yous've added a bone, information technology's time to frame it. To practise so, ensure that you are in Edit fashion by using the Tab cardinal. In this case, we've used a character arm that was modeled in Blender.
To frame your bone, follow these steps:
- Select the whole bone by pressing the A key.
- Rotate it with the R key.
- Finally, grab and motility it around by hitting the G key while using the mouse to motility and align it with the model.
Step three: Extrude
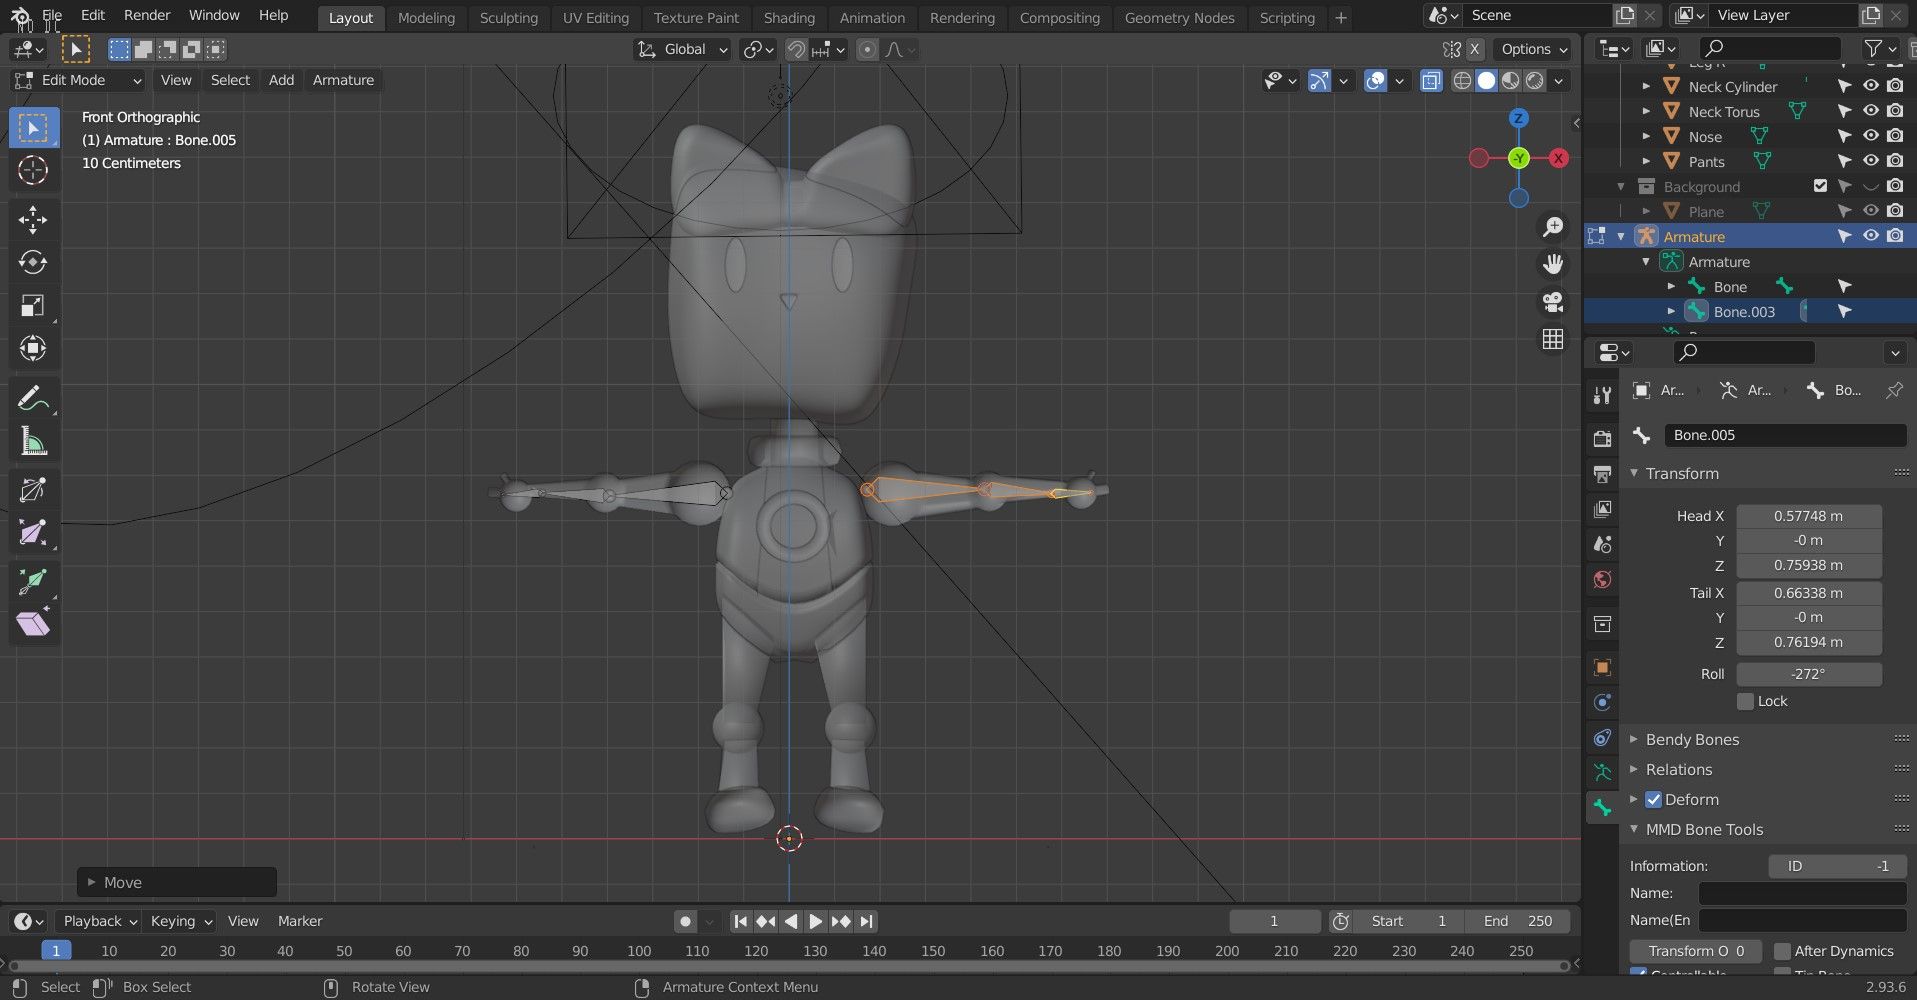
For the next step, it's fourth dimension to extrude the bones. We'll utilize i os as an example. Follow the steps below:
- Ensure not to change the way and let information technology be in Edit fashion.
- Click on your bone, and then, to extrude, but press East. Y'all will notice that a new bone has been created which is now connected to the first bone. This os can be scaled and aligned accordingly; in this example, we've aligned it to the upper arm of our graphic symbol model.
- Now, extrude that bone to make some fingers; these can exist aligned with the grapheme'southward fingers.
- After aligning the bones with the model, remain in Edit mode, and extrude each bone individually.
- Scale the bones with the S central.
In one case you've added all the bones required for the arm, it'south fourth dimension to categorize them.
Step 4: Categorize
During the procedure of rigging, things may become complicated equally more bones are involved. To mitigate this consequence, nosotros need to categorize the bones, starting with renaming them.
To categorize your basic, follow these steps:
- Click on the bone that you want to rename.
- Navigate to the outliner. This is the department that shows all the objects present in the scene as a list on the elevation-right of the 3D viewport (shown in the epitome above).
- Now, double-click on the highlighted bone and rename it.
- Different bones can be categorized by putting them in a collection. Right-click on a bone in the outliner and select New Collection from the menu. The new drove volition be created, and the selected bone will be added to it. To add more bones, simply move them into the collection.
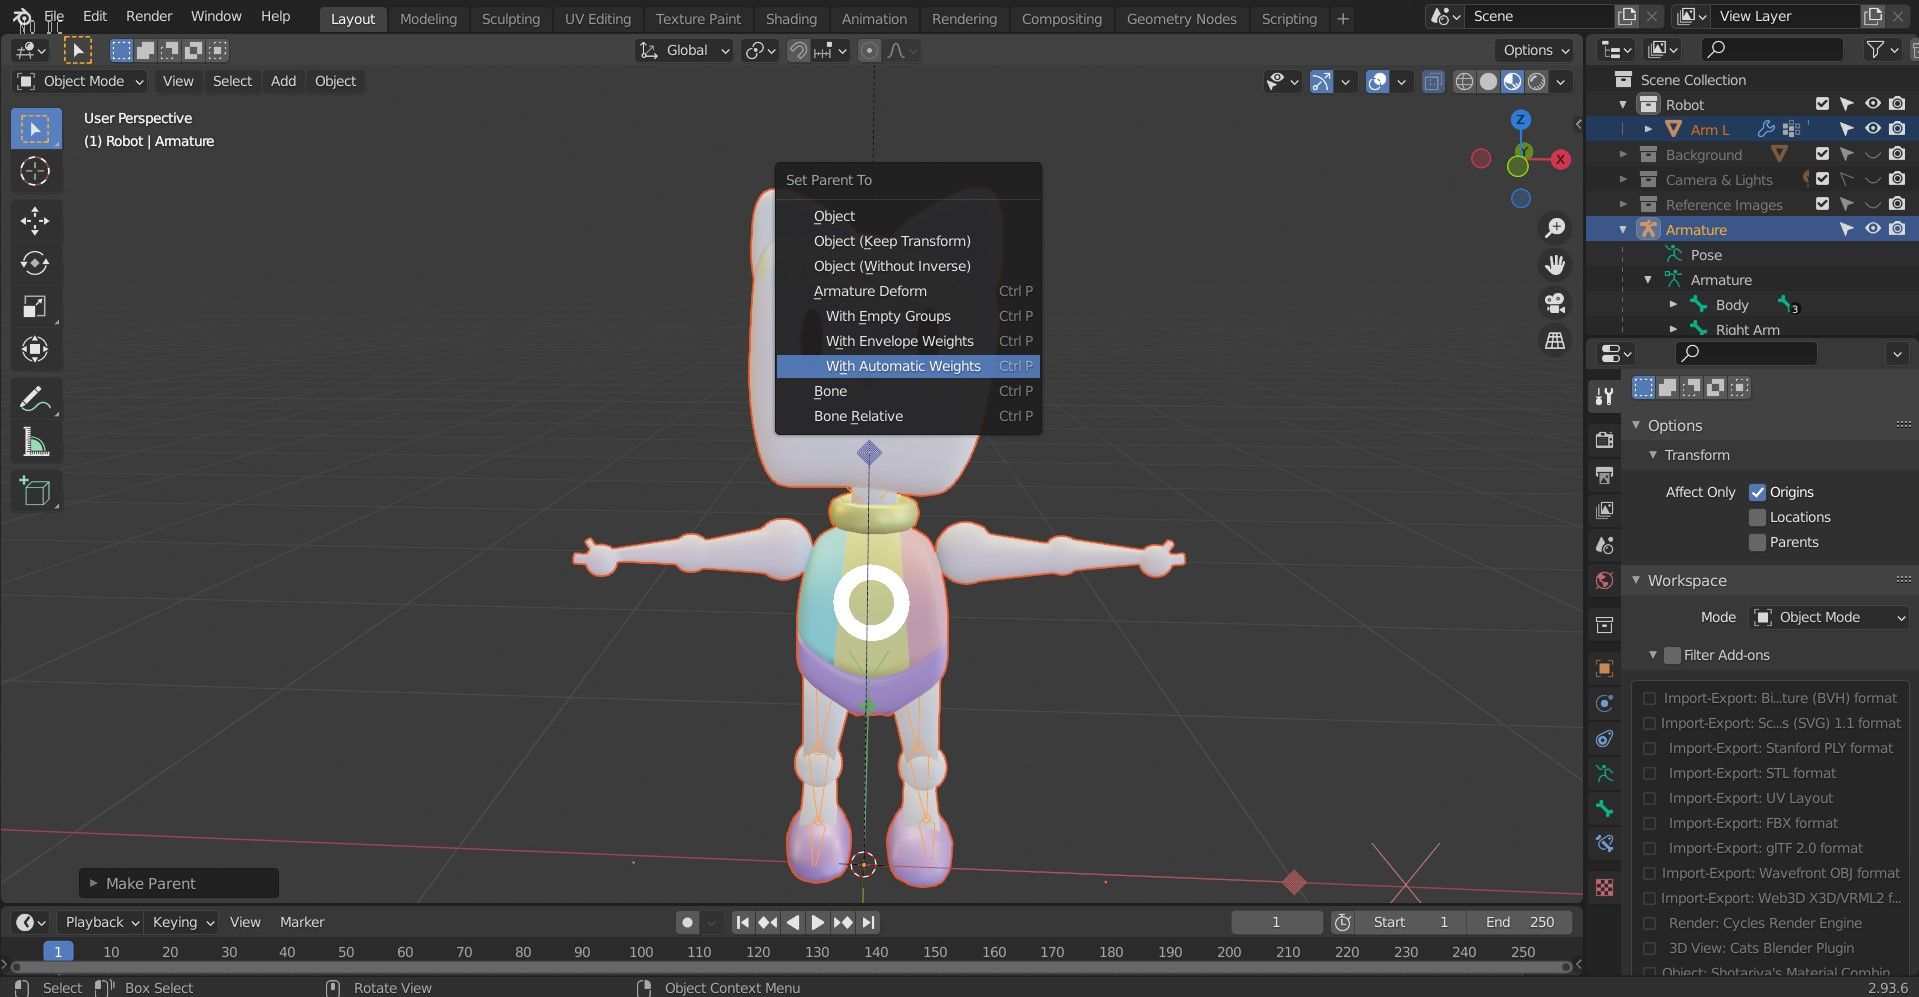
- Enter Object mode past hitting the Tab central.
- Printing A to select everything (both the model and the armature).
- Parent the object by hitting Ctrl + P.
- Now, select With Automated Weights nether the Set up Parent To card.
Congratulations, you've successfully added bones to your model in Blender!
Final Tips
The procedure of adding basic can be complicated, and then nosotros've compiled some tips for you.
Locking
To foreclose unintended changes when working on other basic, yous may want to "lock" basic. While in Edit way, only hit Shift + W and choose Lock. To disable it, expand the Context Collection Boolean Set (this will show upwardly after y'all take locked the bone), so click on Disable.
Duplicating
Only equally you tin duplicate objects, yous can practice the aforementioned for bones. This is very useful if your model has more than i of the same parts, such as its artillery or legs. Instead of doing all that work twice, you tin can indistinguishable it while in Edit mode. Press Shift + D, and now, the selected bones will be duplicated. You tin then move and align them with your model.
Mirroring
When you are modeling, you know that there is no need to exercise twice the amount of work when you tin can use the mirror modifier. Likewise, you can create basic for one side of your model, then choose to mirror them to complete the other side.
While in Edit way, select all the bones you want to exist mirrored. Then correct-click, select Armature Context Menu, hover over Mirror, and select the axis along which the bones are to be mirrored.
Working With Bones in Blender
In this article, we've gone through the central steps involved in adding basic to an armature. We then showed y'all how to gear up them for rigging by categorizing them in the outliner. What are you lot waiting for? Load up Blender, follow this guide, and prepare your models for being brought to life!
Most The Writer

Source: https://www.makeuseof.com/how-to-create-bones-blender/
Posted by: whitemakilds.blogspot.com
0 Response to "How To Delete Windows In Blender"
Post a Comment